How to Use Sewing Patterns
How to use a PDF sewing pattern?
The digital PDF sewing pattern will be sent to your email automatically, immediately after purchase. The pattern includes two versions: a print-at-home pattern and a copy-shop pattern. The print-at-home pattern is divided into smaller sheets that can be printed on your home printer, and then assembled into a complete pattern sheet by either taping or gluing. The copy-shop pattern is divided into larger sheets, which can be sent to a copy shop to be printed.

Home printer settings for a PDF pattern
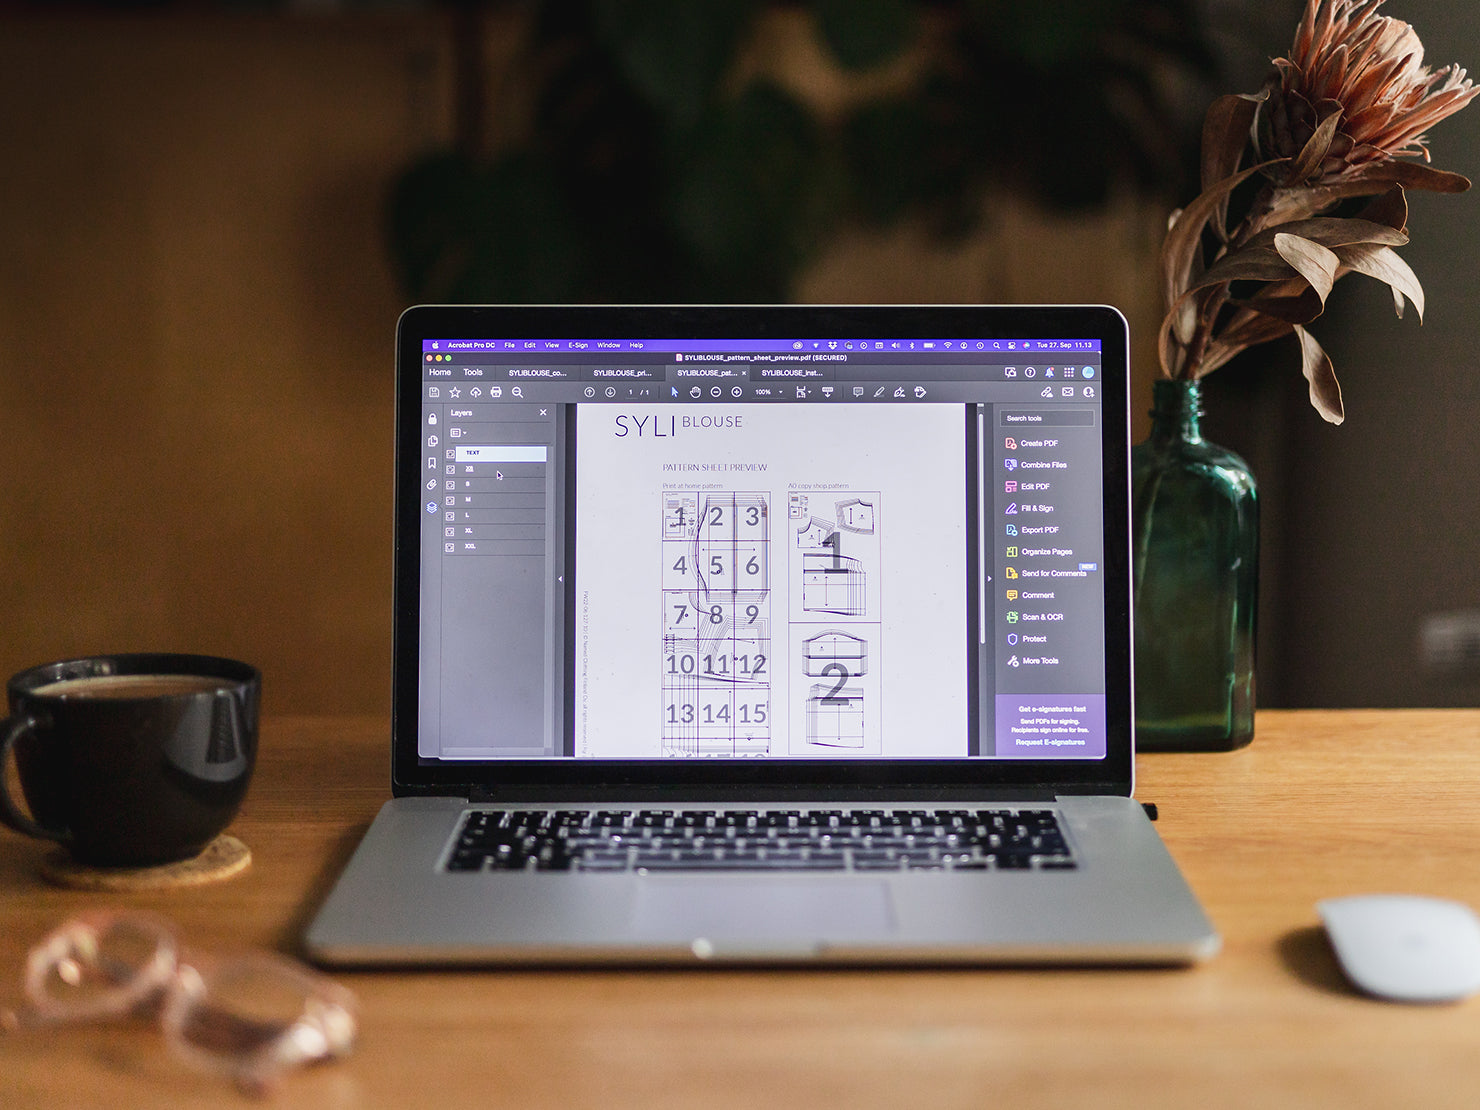
Our PDF sewing patterns are layered, which means that all of the pattern’s sizes are stacked on top of each other on different layers. Here's how you can print the size (or sizes) that you need:
1. Open the PDF pattern file in a suitable program, e.g. Adobe Acrobat or Adobe Reader.
(You can download Acrobat Reader for free here. Note that you will also need a computer – the layers cannot be managed on a mobile device.)
2. Click on the Layers icon on the right panel of the window.

3. Hide unnecessary sizes by clicking on the box next to the size. An eye icon inside the box means that the layer is active and will be printed. The 'Pattern information' layer should also always remain active.

After choosing your desired size(s), proceed to printing. It is important that the printer doesn’t scale the sheet size but prints the pattern in 100% size. Here's how to ensure your pattern is printed to scale:
1. Click on the 'File' menu and select 'Print'.
2. Choose the ‘Actual Size’ under ‘Size options’ and click 'Print'.

3. Once the pattern has printed, measure the 10 cm or 3” test square on the first page of the printed pattern to check that the pattern has been printed to scale.
For troubleshooting, see the section below.
PDF pattern troubleshooting
Problem: Part of the pattern is missing.

Solution: Your pattern might have accidentally been printed as a landscape. The pattern should automatically print as a portrait, but to ensure correct orientation, do this:
1. Open the PDF sewing pattern and prepare the layers as described in the section above, then proceed to printing.
2. In the print dialog box, enable the 'Portrait' option under 'Orientation', and click 'Print'.

Problem: Additional lines appear on the printed PDF sewing pattern.

Solution: If your printed pattern shows additional lines that were not visible on the preview, there might be a compatibility issue with the printing software and the printer. This issue seems to be most common with HP printers and Adobe Acrobat Reader. To resolve the problem, try using the "Print as Image" option in Adobe Acrobat Reader:
1. Open the PDF sewing pattern and prepare the layers as described in the section above, then proceed to printing.
2. At the top of the print dialog box, click 'Advanced'.

3. Enable the 'Print as Image' option and click 'Print'.

How to assemble a PDF pattern sheet?
We have two types of PDF patterns available: Pre-2020, which have been published before 2020, and Post-2020, which have been published or updated during or after 2020. See the details section of the pattern to find out the type of your pattern.

Post-2020 patterns
The contents of printed sheets are always bordered by a thin black frame. If this frame is not visible on all edges of your printed sheet, it has not printed correctly. Please see 'Home printer settings for a PDF pattern' above for detailed printing instructions. Cut the right and the bottom edge away from each individual sheet along the edge of the frame. Then, tape the sheets together by connecting them according to the number and letter combinations (1A to 1A and so on), with the edges of the frame facing each other. For example, start by taping all horizontal rows together, then continue by adding the vertical rows. Trace the pieces from your assembled pattern onto tracing paper.
Pre-2020 patterns
After printing your pattern, arrange the sheets according to the image on the cover page of the pattern sheet. The right bottom corner of each sheet is numbered and labeled with the product name – this way you can always check the correct order of the sheets. Cut off one long and one short border marked on the edge of each sheet. Cut the same long and short side of each paper and tape or glue the sheets together so that you link the uncut side to the cut side next to it. It is the easiest and fastest to first link all vertical or horizontal rows and then assemble the other direction. Cut and assemble the pattern sheets as carefully as you can to keep the proportions of the pattern correct.
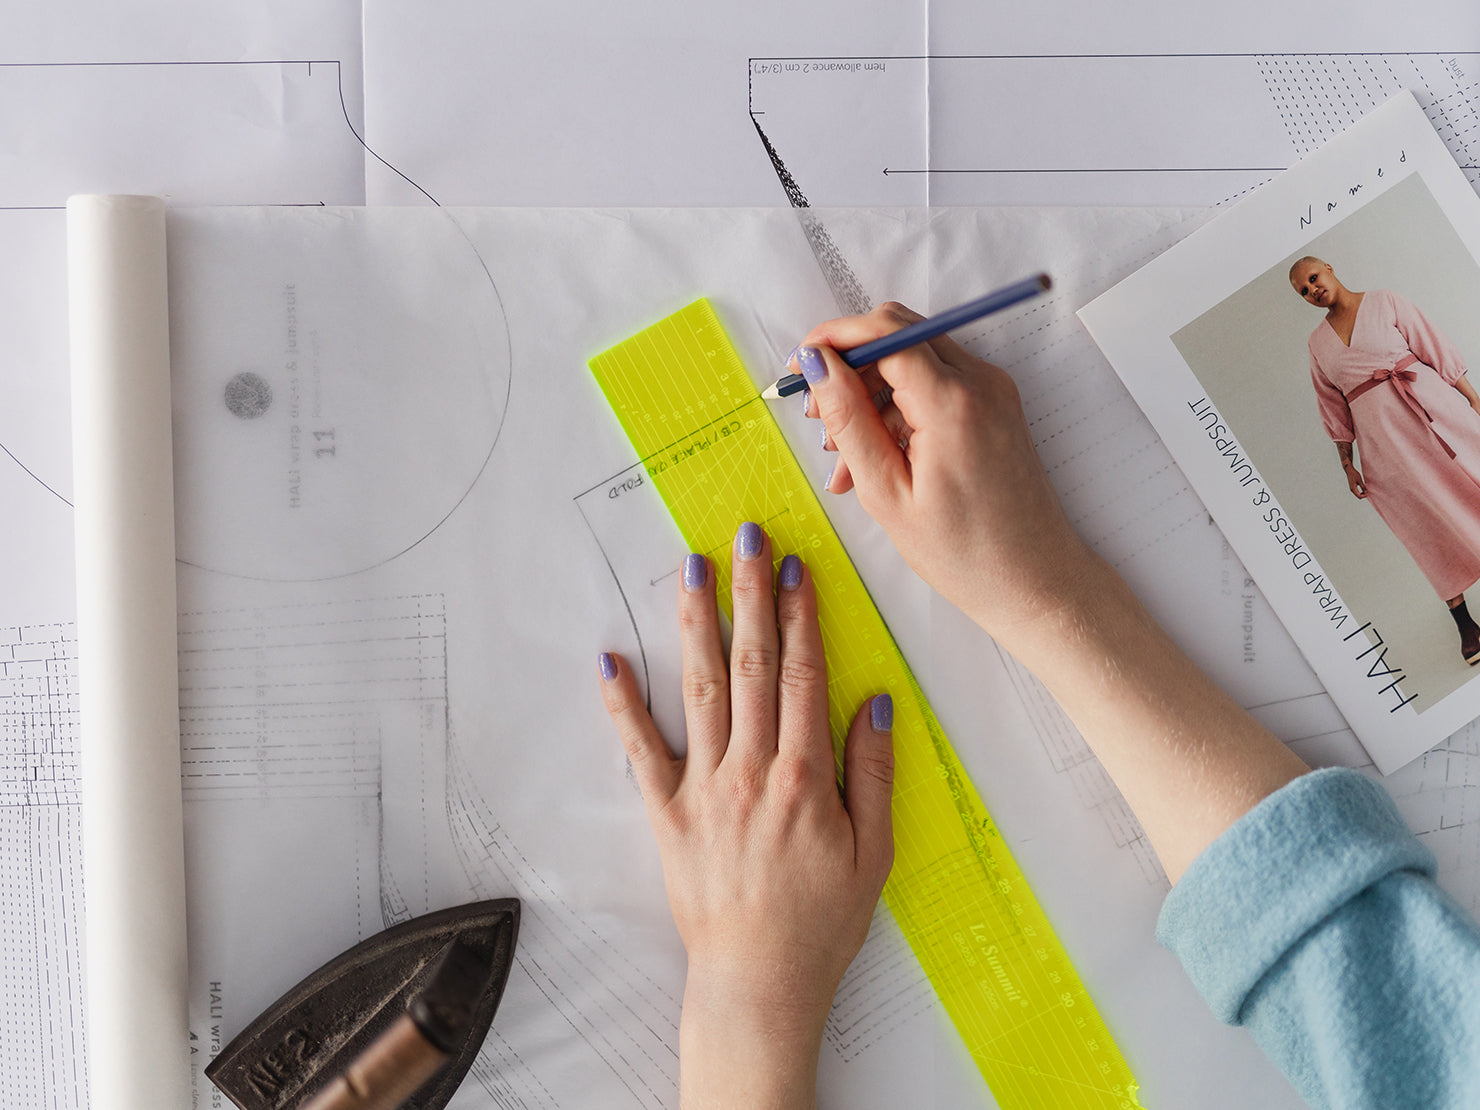
How to trace a sewing pattern?
On our individual printed patterns the pattern pieces have been set clearly apart so that they can be cut directly from the sheets without tracing. However, we always recommend copying the patterns onto tracing paper to preserve the original sheet.

Trace the pieces from the sheet onto pattern paper: Check the list on the top left corner of the sheet to find out what line type has been used for your size. Place the pattern paper on top of each piece one at a time and make sure that the whole piece fits on the paper. Trace the pattern and any markings onto the paper, using a marker pen for example, with a ruler and curve ruler to help if necessary.
If the pattern includes multiple variations, the different variations of the garment are indicated on the pattern with numbered lines, so follow the lines for your chosen option carefully. Larger sized pattern pieces may be divided into two parts, with the dividing line indicated with a letter. Find both halves of any divided pieces, and first trace one of the halves onto the pattern paper. Then move the pattern paper to the other half, positioning the lines in accordance with the letters (letter A against letter A and so on), and then finish drawing the piece.
Copy not only the outline of the pattern for the size you have selected, but also any markings, such as notches, darts, pocket locations, grainline arrows, body lines and all text on the pattern. Make sure to also write the name and size of the product and pattern parts on the pattern. Pattern markings are explained on the table on the top left corner of the sheet.


